
 Welcome to the 6th (and final?) Crafty Blog School post - today I'll show you simple ways to take better pictures of your crafts. Want more Crafty Blog School posts? Just leave a comment with your suggestions, and I'll put as many more together as you want!
Why don't my crafts get the love they deserve?
Let's say you just finished this amazing craft. I mean, you look at it and say to yourself - "this is a freaking work of art, self." You snap a picture, upload it into Flickr or write a blog post and then... nothing happens. No comments, no faves. Absolutely no love for your masterpiece, which is looking sadder and lonelier by the minute. Has this happened to you? If it has, don't be sad or disappointed! Faves and oodles of comments are by no means a measure of greatness - if you love what you made, in my opinion, mission accomplished.
Could it be... the pictures?
Maybe one reason your crafts don't get the love they deserve is the pictures you post of them? You don't have to be a professional photographer with an expensive camera, or a Photoshop wiz with mad computer skills! There are a few simple things anybody can do to make their pictures better. I promise anybody can do it, and that means you too!
How to Take Better Pictures
- Always use daylight to take your pictures - try snapping pics of your crafts outside or by a bright window.
- Turn off that flash! It creates a nasty glare on your stuff, especially if it's bright or reflective.
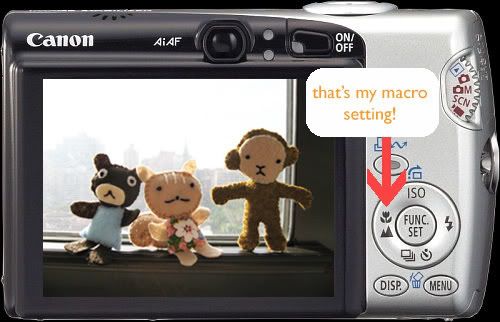
- Use your macro setting for close-ups! (Don't know where your macro setting is? Almost all digital cameras have it- usually it's a little flower symbol... mine looks like this)
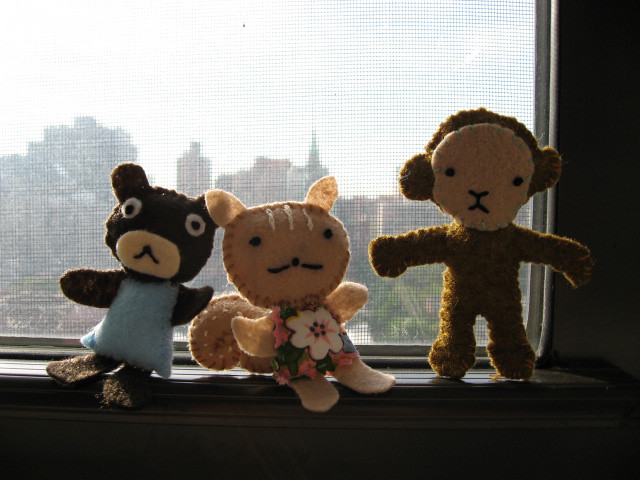
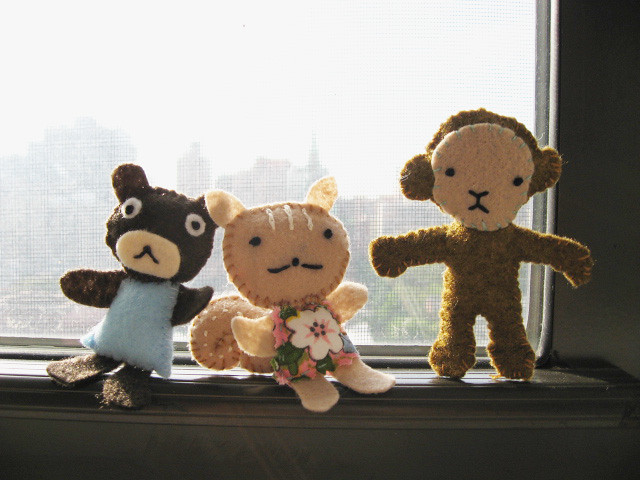
- Put your crafts in fun and interesting settings - here are just a few examples...
Advanced: How to Tweak Your Pictures in Photoshop
These 2 tweaks can make any picture look better! For example, this picture is way too dark:

- Adjust levels: how do I do that?
Sometimes this does the trick - but our pic is still too dark, so now we'll...
- Adjust brightness using Screen: how do I do that?
Done! Yay!
That's All, Folks
Well, that does it for Crafty Blog School! I hope you enjoyed all the posts, learned a little something, or were inspired to try something new. This doesn't have to be the last post, I'm just tapped out for ideas... Let me know if there's something you'd like to see!
All The Crafty Blog School Posts:
week 1: Where Do I Blog?
week 2: Choosing a Template
week 3: Name Your Blog & Create a Header
week 4: Blogging Photos from Flickr
week 5: How to Put that Darned Thimble Guy in Your Sidebar
week 6: How to Take Better Pictures of Your Crafts
week 7: Getting Noticed


